Get Expert Advice - Free Today

Eyebrow Transplant Cost in India: A Complete Guide

Eyebrows do much more than frame the eyes. They improve facial symmetry, express emotions, and even protect the eyes from sweat, water, and debris. For those with sparse, damaged, or absent eyebrows, relying solely on makeup can be both time-consuming and unsatisfactory. 

A more permanent solution is an eyebrow hair transplant. This comprehensive guide explains the procedure, methods, cost factors, and everything you need to know about getting an eyebrow transplant in India.

What Is an Eyebrow Hair Transplant?

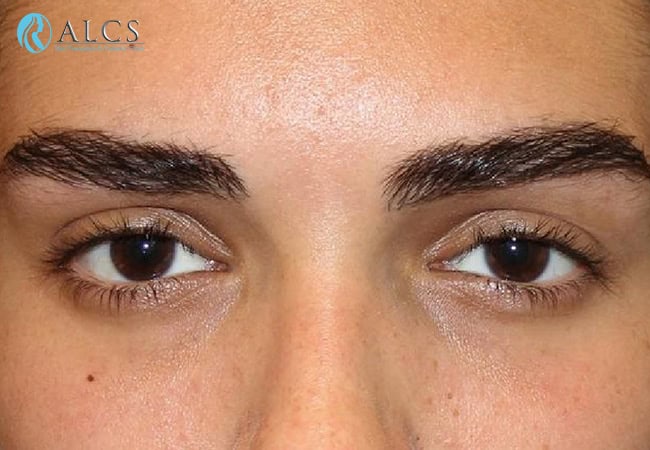
An eyebrow hair transplant is a specialized cosmetic procedure that involves relocation of hair follicles from the donor area – usually behind the ears or on the lower back of the scalp – to the eyebrow region. The procedure can be performed with local anesthesia in order to make the patient suffer minimal discomfort while undergoing the treatment. 

They would be integrated once implanted into the natural eyebrow. They continue growing as they had been growing before at the donor site. It is possible to have them trimmed from time to time to appear neat, and the results would be long-term and natural.

Eyebrow Transplant Cost in Different Cities of India

Below is a table with the approximate cost range per graft and the total cost of an eyebrow transplant in various Indian cities:

CitiesCost per Graft (INR)Total Cost (INR) 
Mumbai80-15020,000-50,000
Indore40-8020,000-30,000
Delhi80-15020,000-50,000
Bangalore80-15020,000-50,000
Chennai70-13020,000-50,000
Kolkata70-13020,000-50,000
Hyderabad80-15020,000-50,000
Pune75-14020,000-50,000
Ahmedabad80-15020,000-50,000

Methods of Eyebrow Transplantation

There are two main methods of an eyebrow hair transplant: Follicular Unit Extraction (FUE) and Follicular Unit Transplantation (FUT). More advanced techniques include Direct Hair Implantation (DHI) and micropigmentation, which provide new options.

Follicular Unit Extraction (FUE)

A small patch of hair is shaved at the donor site, from which individual hair follicles are extracted. The transplanted grafts are preserved in a saline or plasma solution when they cannot be implanted right away.

Advantages: This procedure is very less invasive and leaves very little scarring. The extraction and implantation are done very precisely to resemble the growth of hair, which occurs naturally.

Follicular Unit Transplantation (FUT)

A strip of skin with hair follicles is removed from the donor region, which is usually taken from the back of the head. The strip is dissected carefully into individual grafts to ensuring the grafts stay hydrated.

Considerations: FUT is relatively more invasive compared to FUE because the former requires a strip removal which will cause a linear scar.

Advanced Techniques: DHI and Micropigmentation

Direct Hair Implantation (DHI)

In DHI, hair follicles are taken out and implanted directly into the recipient site with a specialized tool. This tool gives the surgeon precise control over the depth and angle of implantation.

Benefits: The precision of the DHI technique ensures a natural appearance since each hair is placed to follow the natural direction of growth.

DHI Micropigmentation

In this process, rather than transplanting hair, the skin is implanted with a non-toxic pigment in order to create a denser look for the eyebrows. Unlike the traditional eyebrow tattoos, DHI micropigmentation uses pigments that reflect short hair and is applied in a manner that blends very well with any present hairs.

Reasons why Eyebrow Transplant in India is Cost-Effective

This is one of the main expense determinants of an eyebrow transplant in India. Understanding these can help you plan your treatment and manage your expectations of the costing.

1. Case complexity

Greater extents of hair loss or damage may necessitate more grafts, and hence the expenditure will be higher. Those with heavier scar tissue formations or additional health issues may incur higher charges due to the added complexity.

2. Artistic Skill

In comparison, highly experienced and internationally certified surgeons usually charge more in terms of their experience and precision. As the procedure is as much an art as it is a science, a superb surgeon who consistently delivers natural-looking results might come at a premium.

3. Technique and Technology

The FUT technique is typically more invasive and costly than the FUE technique. Advanced techniques such as DHI also need high-end tools, which adds to the expense. Using high-tech, accurate equipment also increases the cost.

4. Technician and Staff Involvement

The expertise of the nursing staff and technicians involved also determines the final cost.

More personnel or specialized support may result in higher charges.

5. Location and Facility

The prices vary significantly between cities. The clinics in the metropolitan cities, such as Mumbai and Delhi, will charge higher fees due to the high operating cost and increased demand. The clinics offering hi-tech facilities and high-grade hygiene and care may also recover more.

Why opt for an Eyebrow Transplant?

Eyebrow transplants can help in finally ending various eyebrow hair loss or dissatisfaction in one’s natural eyebrow shape. Following are some common reasons people choose this surgery:

1. Congenital or Developmental Conditions

Some people are born with naturally thin or uneven eyebrows (a condition known as hypotrichosis). For those who desire a fuller and more defined eyebrow, a transplant can provide a dramatic aesthetic boost.

2. Traumatic or Accidental Damage

Accidents or burns can damage or completely remove eyebrow hair, necessitating reconstruction. In cases where scarring has altered the natural eyebrow line, transplantation can help restore symmetry.

3. Over-Plucking and Cosmetic Damage

Overapplication of low-quality makeup or excessive plucking of brows causes sparse eyebrows. Instead of daily makeup application, the transplant is a much more permanent correction for the problem.

4. Professional and Personal Reasons

Media and public personalities: Actors, models, and celebrities frequently need well-defined eyebrows for shoot-on screen purposes. A well-groomed eyebrow leads to well-defined facial contours and gives a boost to the esteem and confidence level of a person.

Possible complications and risks

Although transplant eyebrow procedures are generally safe, if one wishes to be conscious of the inherent risks and complications associated with such procedures, they include:

  • Swelling on the brows and around the eyes, combined with mild pain, is expected.
  • Some of the existing eyebrows can fall off for a while after the transplantation.
  • In the case of the FUT method, in particular, there could be a linear scar left at the donor area.
  • The area will itch and may be numb due to healing.
  • If the surgeon is not experienced, or hygiene is poor, there is a chance of infections, cysts, or ingrown hairs.

The best way to avoid these risks is to get a qualified and well-known surgeon who follows all sterilization techniques and has the latest technology.

Post-Procedure Care and Recovery

Proper care after an eyebrow transplant is what makes the surgery successful. The following are the key post-procedure guidelines.

Immediate Post-Procedure

  • Let your body rest and avoid any strenuous activities.
  • Take prescribed pain relievers and antibiotics to manage discomfort and prevent infection.
  • Apply a cool compress gently to reduce swelling.

Short-Term Care

  • Clean the transplant area as advised by your doctor. Avoid rubbing or scratching the area.
  • Do not wear makeup for some days to avoid irritation.
  • Avoid direct sunlight on the transplanted area to avoid possible damage or discoloration.

Long-term Care

  • When the transplanted hair grows, trimming might be necessary from time to time to keep it in shape.
  • Regular check-up with the surgeon will ensure proper monitoring and concern of the issues.
  • Smoking and alcohol abuse should be avoided as they can delay healing.

Realistic Expectations and Final Results

It is essential for anyone planning to undergo an eyebrow transplant to know the time frame for recovery and results:

  1. Initial Shedding: There is a tendency for some of the transplanted hairs to fall out within the first 1 to 1.5 months.
  2. Early Growth: New hair growth is usually observed around 4 to 5 months after the procedure.
  3. Full Result: The complete results may take up to 12 months for the hair to grow naturally from the donor site.

Conclusion

Eyebrow transplants have emerged as an option in India as a reliable, permanent alternative for people struggling with sparse, uneven, or damaged eyebrows. From FUE and FUT to advanced DHI methods, and micropigmentation techniques, there is a variety of options for each patient based on their specific requirements and aesthetic demands.

The cost of an eyebrow transplant depends on several factors, such as the complexity of the case, the surgeon’s expertise, the chosen method, the skills of the supporting staff, and the location of the clinic. As seen in our cost table, prices vary significantly from city to city, making it essential for potential patients to research and consult with multiple clinics to find the best option that fits both their needs and budget.

How to Lose Breast Fat Quickly: Best Exercises, Tips & Diet Advice

Many people want to reduce breast fat for health, comfort, or aesthetic reasons. Large breasts can cause shoulder, upper back, and neck pain. Some people choose to reduce their breast size for cosmetic or emotional reasons. 

Genetics, body weight, age, and hormones all influence breast size, but you can take natural steps to lose breast fat quickly and safely. This guide offers clear advice on diet, exercise, and lifestyle changes that reduce breast fat and improve overall health.

Breast Fat and What Affects Breast Size

Breasts consist mostly of fatty tissue, and you may see a reduction in breast size when you work on reducing overall body fat. Body weight, hormonal changes, and certain medications affect your breast size. 

Pregnancy, thyroid problems, and some birth control pills can enlarge your breasts. You achieve the best results by lowering your overall body fat while working to tone the chest area.

Natural Ways to Reduce Breast Fat

Natural methods avoid surgery and focus on healthy lifestyle changes. You lower your overall body fat through a nutritious diet and regular exercise. These methods help reduce breast fat and support your long-term well-being.

Before you make big changes, speak with your doctor, especially if you face health issues or hormonal imbalances. Your doctor helps you choose the best plan to reduce breast fat based on your overall health.

Focus on Nutrient-Dense Foods

Since most of your breasts consist of fat, losing body fat can reduce their size. To do this, create a calorie deficit by eating fewer calories than you burn. Choose foods that are low in calories and high in nutrients. Focus on:

  1. Fill half your plate with colorful vegetables and fruits. They provide vitamins, minerals, and fiber that support your metabolism and keep you full.
  2. Include lean meats like chicken and turkey, as well as fish and plant-based proteins. Protein builds muscle and keeps you satisfied.
  3. Replace refined grains with whole grains like brown rice, quinoa, and oats. These grains stabilize your blood sugar and provide lasting energy.
  4. Incorporate fats from sources like avocado, olive oil, and nuts. Healthy fats support hormone balance and help your body work properly.

Avoid Processed Foods and Sugary Snacks

Processed foods, fast foods, and sugary snacks add extra calories without many nutrients. These foods make it harder for you to lose weight and reduce breast fat. Instead, choose whole, fresh foods that help your body burn fat more efficiently.

Plan Your Meals

Plan your meals ahead of time to control portion sizes and avoid unhealthy choices. Prepare a weekly menu that includes balanced meals and healthy snacks. This strategy keeps you on track and helps you focus on your goal of losing breast fat.

Stay Hydrated

Drink enough water for overall health. Water helps your body burn fat and keeps you feeling full. Aim for at least 8 cups of water per day. Add a slice of lemon or cucumber for extra flavor without adding calories.

Exercise: Burn Fat and Tone Your Chest

Exercise plays a major role in losing body fat, including breast fat. Remember that you cannot spot-reduce fat from one area, but you can lower overall body fat while strengthening the muscles beneath your breasts. These exercises help reduce fat and tone your chest.

Cardiovascular Exercises

Cardio exercises burn calories and reduce overall body fat. Choose activities that raise your heart rate. Some effective options include:

  • Running or Jogging
  • Swimming
  • Cycling
  • Jump Rope

Aim for at least 30 minutes of cardio exercise on most days of the week. You achieve the best results by staying consistent when you try to lose fat.

Chest-Strengthening Exercises

Chest exercises do not melt fat directly from your breasts, but they strengthen and tone the muscles underneath. Strengthening your chest creates a lifted look and may reduce the overall appearance of breast fat. Here are some effective chest exercises:

  1. Push-Ups

Push-ups are a classic exercise that targets your chest muscles (pectorals), arms, and shoulders. They build muscle strength and improve overall tone.

How to do push-ups:

  • Lie face down on the floor.
  • Place your hands next to your shoulders.
  • Push your body up until your arms are straight.
  • Slowly lower your body until your chest nearly touches the ground.
  • Repeat the movement.

Start with 10 push-ups for 3 sets. If regular push-ups challenge you too much, begin on your knees until you build enough strength.

  1. Dumbbell Front Raises

Front raises work your chest and shoulder muscles. They strengthen your upper body, which may relieve shoulder and back pain linked to large breasts.

How to do dumbbell front raises:

  • Stand with your feet shoulder-width apart.
  • Hold a dumbbell in each hand at your thighs.
  • Keep your back straight and lift your arms in front of you to shoulder height.
  • Pause for a moment, then slowly lower your arms.
  • Repeat the exercise.

Do 12 repetitions for 3 sets. If you do not have dumbbells, use small cans or tins of beans as a substitute.

  1. Chest Press

The chest press works your chest, shoulders, and arms. It builds muscle under the breast area, which creates a firmer appearance.

How to do a chest press:

  • Lie on your back on a bench or the floor.
  • Hold a dumbbell in each hand at your chest.
  • Press the dumbbells upward until your arms extend.
  • Slowly lower the dumbbells back down.
  • Repeat the exercise.

Perform 10 repetitions for 3 sets. You may also use a barbell or substitute tins if dumbbells are unavailable.

  1. Dumbbell Fly

Dumbbell fly exercises target the inner chest muscles and help lift your breasts. They stretch and contract your chest muscles.

How to do dumbbell fly:

  • Lie on your back on a bench or the floor with a dumbbell in each hand.
  • Hold your arms straight up above your chest with your palms facing each other.
  • Slowly lower your arms out to the sides until you feel a stretch in your chest.
  • Bring your arms back to the starting position.
  • Repeat the exercise.
  1. Upright Row

Upright rows work your upper chest and shoulders. They help improve muscle tone in your upper body.

How to do an upright row:

  • Stand with your feet shoulder-width apart.
  • Hold a dumbbell in each hand.
  • With your elbows slightly bent, pull the dumbbells upward toward your chest.
  • Slowly lower the dumbbells back down.
  • Repeat the exercise.

Lifestyle Changes to Boost Your Results

Some additional lifestyle measures can be taken to boost the results from diet and exercise: 

Reduce Estrogen Levels Naturally

Estrogen plays a key role in the growth of breast tissue. High estrogen levels, whether due to hormonal imbalances or medications, can increase breast size. You benefit overall by making these changes, and they may contribute to reducing breast fat.

Wear the Right Bras and Bindings

Bras and bindings do not change breast tissue permanently, but they can reduce the appearance of large breasts and provide comfort. A minimizer bra lifts and shapes your breasts so that they appear smaller. Some people also use bindings. If you choose to bind, consult a healthcare professional to learn the safest method.

Get Enough Sleep and Manage Stress

Good sleep and low stress help regulate your hormones. Stress and lack of sleep cause weight gain, which in turn affects your breast size. Aim for 7 to 8 hours of quality sleep each night and use simple stress-reduction techniques like deep breathing, meditation, or spending time with loved ones.

Conclusion

Losing breast fat quickly remains possible with a focused plan that combines proper nutrition, targeted exercises, and lifestyle changes. You achieve a healthier body and reduce breast size by lowering overall body fat and strengthening the muscles underneath your breasts. 

This process not only improves your physical comfort by reducing back, shoulder, and neck pain, but it also boosts your confidence and overall well-being.

Always remember that each body is unique, and what works for one person may not work for another. Listen to your body and adjust your plan as needed. If you have any concerns about your health or the methods you use, speak with a professional.

Dimple Surgery Cost in India: Everything You Should Know

Dimples add charm to a smile and symbolize youth and beauty across many cultures. Many people admire dimples whether they were born with them or not. If you want a dimpled smile, dimple plastic surgery, also called dimpleplasty, gives you a safe and effective way to create artificial dimples. 

This guide explains everything you should know about dimple surgery in India. We cover how the procedure works, what to expect before and after the surgery, the risks you might face, and the factors that affect the cost. 

What is Dimple Plastic Surgery?

Dimple plastic surgery is a cosmetic procedure that creates artificial dimples on your cheeks. The surgery works by modifying your underlying facial muscles and skin to form a small indentation, which gives you the look of natural dimples. 

Many people choose this procedure for aesthetic reasons because they believe a dimpled smile improves their appearance and makes them look more youthful and charming.

Dimple Surgery Cost in India

Many patients focus on the cost of dimple surgery. In India, the cost of dimple plastic surgery typically ranges between ₹30,000 and ₹90,000. Several factors affect the overall cost:

Number of Dimples

The more dimples you want, the higher the cost. Some people opt for a single dimple on one cheek, while others choose dimples on both cheeks. The final price depends on the number of dimples you want to create.

Complexity of the Procedure

Different techniques can create dimples. The complexity of the chosen method influences the cost. For instance, a procedure that requires more intricate work or special equipment may cost more than a simpler method.

Choice of Clinic

The location and reputation of the clinic also affect the cost. Clinics in metropolitan areas or those with a highly experienced team may charge a bit more. However, you do not need to spend a fortune to get a safe and effective procedure. Always focus on the surgeon’s expertise and patient reviews rather than just the cost.

What to Expect During the Procedure

Dimple surgery is a brief, minor procedure that most patients complete on an outpatient basis. Here is a step-by-step overview of the process:

Consultation and Planning

Before the surgery, you meet with your surgeon for a consultation. During this session, the surgeon discusses your goals and expectations. Together, you decide on the exact location of your new dimples. This planning ensures that your dimples will be placed in positions that look natural and suit your facial features.

Marking the Site

Once you agree on the location, the surgeon marks the spots on your cheeks where the dimples will form. This step is crucial for ensuring symmetry and precision during the procedure.

Local Anesthesia

To keep you comfortable during the surgery, the surgeon uses a local anesthetic. This means that only the targeted area becomes numb while you stay awake and feel no pain during the procedure.

Creating the Dimples

The technique used to create your dimples may vary depending on the surgeon’s experience and your desired outcome. There are two common techniques:

  1. Suture Method: In this method, the surgeon passes a suture—a type of thread—through the marked spot on your cheek using a needle. The suture connects the underlying muscle to the outer layer of skin. This connection forms a small indentation, giving you the appearance of a dimple. The advantage of this method is that it does not remove any tissue, which makes for a smoother recovery.
  2. Incision Method: Alternatively, the surgeon may make a tiny incision with a surgical blade at the marked spot. This incision creates a controlled scar that is anchored to the underlying muscle with a surgical knot. Your surgeon may choose this method based on the depth and look you want for your dimples.

Finishing the Procedure

After the dimples are created, the surgeon checks for symmetry and the overall appearance. The entire procedure usually takes less than an hour, and you leave the clinic on the same day.

Recovering from Dimple Surgery

The recovery process for dimple plastic surgery is usually straightforward. Most people resume their daily activities within a few days. Here is what you need to know about recovery:

  1. Oral Hygiene – Maintaining good oral hygiene is essential. Since the area around your mouth is involved, keeping it clean helps prevent infection. 
  2. Limiting Smiling – For about two weeks after the surgery, avoid full, wide smiles. This precaution helps your new dimples settle into place properly. Although you might feel awkward at first, this restriction is temporary and plays a major role in achieving the final results.
  3. Medications – Your surgeon will likely prescribe antibiotics to prevent infection and pain relievers to manage discomfort. Sometimes, anti-inflammatory medications are also recommended to reduce swelling.
  4. Managing Swelling – Some swelling is normal after dimple surgery. You can apply an ice pack to the treated area to reduce swelling and ease any discomfort. Use the ice pack for short intervals as your doctor advises.
  5. Follow-Up Appointments – Your doctor schedules follow-up visits to check on your healing process. These appointments allow the surgeon to ensure that your dimples are forming as expected and to address any concerns you may have.

Risks and Considerations

Although dimple surgery is generally safe, some risks exist. It is important to understand these risks before deciding to proceed with the procedure.

  • Scarring
  • Pain and Discomfort
  • Infection
  • Bleeding

How to Reduce Risks

To minimize these risks, choose a qualified and experienced surgeon. Follow all pre- and post-operative instructions carefully. If you notice unusual symptoms such as excessive swelling, pain, or signs of infection, seek medical advice right away.

Benefits of Dimple Surgery

For many, the appeal of dimple surgery goes beyond simply changing their appearance. Here are some benefits you can expect from this procedure:

  • Dimples add a youthful and attractive quality to your smile. Many people believe a dimpled smile makes them look friendlier and more approachable.
  • A new, attractive feature on your face can boost your self-esteem. If you have always admired people with dimples, having your own can make you feel more confident in social and professional settings.
  • Dimple surgery is a minor procedure that takes less than an hour. With minimal downtime and a low risk of complications, it offers a convenient way to enhance your appearance without undergoing major surgery.
  • Most patients who have dimple surgery experience minimal scarring. Modern techniques ensure that any scars that form are small and fade over time, leaving you with a natural look.

How to Choose the Right Surgeon and Clinic

Selecting the right clinic and surgeon is a crucial step in your dimple surgery journey. Use these tips to make the best choice:

  • Search for clinics that specialize in cosmetic procedures and have a strong track record in dimple surgery. Check patient reviews and before-and-after photos to gauge the results you can expect.
  • During your consultation, ask the surgeon about their experience, the techniques they use, and what you can expect during the procedure and recovery. A good surgeon answers your questions clearly and helps you feel confident in your decision.
  • Choose a clinic that offers a clean, modern, and supportive atmosphere. The quality of care and technology used can make a significant difference in the outcome of your surgery.
  • Experience matters. Look for a surgeon who has performed many dimple surgeries and can show a portfolio of successful results. This experience ensures that your procedure is safe and effective.

Conclusion

If you are considering dimple surgery, take time to research and plan carefully. This comprehensive guide covers all the aspects you need to know—from the basics of the procedure to detailed insights into preparation, recovery, and cost factors. You can make a well-informed decision that leads to a positive and fulfilling outcome with the right information and mindset

Frequently Asked Questions (FAQs)

Is dimple surgery painful?

Dimpleplasty, or dimple creation surgery, is normally painless since a local anesthetic is used to numb the region.

Can I get dimples permanently?

If natural methods do not produce the desired effects, you may want to look into a more permanent option—dimple surgery, also known as dimpleplasty.

What is the recovery process after Dimpleplasty?

The sutures dissolve and absorb in about two weeks, and the skin relaxes, resulting in a more natural look. When the internal tissue heals, it joins the cheek muscles to the skin, resulting in a dimple when smiling. You will be allowed to eat after the operation, but it is best to wait until the anesthetic has worn off.

Biofibre Hair Transplant: What You Need To Know

Hair loss affects anyone and can affect confidence and self-esteem, especially when thinning hair or baldness begins to change your appearance over time. Many people explore different hair restoration options to improve hair density and regain a fuller look. 

Among the available solutions, you may have come across a biofibre hair transplant, a cosmetic hair restoration procedure designed to create the appearance of fuller hair using synthetic fibers rather than natural hair follicles. 

People looking for biofibre hair transplant in Jaipur can consult ALCS Hair Transplant and Cosmetic Clinic to better understand whether this treatment aligns with their hair restoration goals and expectations. Since the procedure provides instant visible results, it may appeal to people with advanced hair loss, limited donor hair, or those looking for additional density after previous treatments.

What Is a Biofibre Hair Transplant?

A biofibre hair transplant is a cosmetic hair restoration procedure that uses synthetic fibers instead of natural hair follicles to create the appearance of fuller hair. It provides immediate results and does not require donor hair from another area of the scalp.

Unlike traditional hair transplant methods that relocate living follicles, biofibre hair transplantation involves implanting artificial fibers directly into the scalp. These synthetic fibers are designed to mimic the appearance of natural hair and are secured beneath the skin using specialized implantation techniques.

Biofibre hair is available in multiple colors, lengths, and textures to help create a natural-looking result. The fibers are implanted individually by trained specialists and usually require a tolerance test beforehand to ensure the scalp accepts the material properly.

What Does Biofibre Hair Look Like?

Biofibre hair comes in a range of lengths from 15 cm to 45 cm and in 13 different colors. The fibers keep their color over time; they do not grey like natural hair. This feature benefits those who are completely bald and want a consistent hair appearance. However, if you have some natural hair, the biofibre might look a bit different as your natural hair changes with age.

Color and Texture Selection

You choose from several hair textures and colors to match your natural hair as closely as possible. While biofibre hair is designed to look natural, keep in mind that you should not bleach or dye it. This requirement means you need to select a color that you will be happy with for several years.

Biofibre hair transplants target the head. The procedure does not suit areas like eyebrows, beards, or other parts of the body because these areas remain more sensitive.

Types of Biofibre Hair Available

Biofibre hair comes in different implantation options designed to create varying levels of density and coverage. The right choice depends on the treatment area and the desired appearance.

1. Standard Biofibre (Biofibre 4.0)

Standard Biofibre is designed to provide natural-looking coverage while improving overall density. Approximately 1,000 implanted fibers can create the visual effect of nearly 3,000 natural hairs.

Specialists commonly use this option to improve frontal hair coverage and lower the hairline.

2. High-Density Medicap (MHD)

High-Density Medicap uses a denser implantation technique to create a fuller appearance. In this method, specialists implant three synthetic hairs into a single implantation point.

MHD is commonly used for areas such as the crown, where additional volume may be needed.

The appropriate option depends on your hair restoration goals, scalp condition, and desired density.

Who is a Good Candidate for a Biofibre Hair Transplant?

A biofibre hair transplant works best for people who want immediate cosmetic improvement and may not qualify for traditional hair transplants. It is especially useful for people with little or no donor hair available.

Unlike natural hair transplants that rely on healthy donor follicles, biofibre implants use synthetic fibers. This makes the procedure attractive for people who have extensive hair loss or have already exhausted donor areas from previous surgeries.

You may be a good candidate if you:

  • Have advanced baldness with limited donor hair
  • Want instant visible results
  • Have undergone previous failed hair restoration procedures
  • Have scalp scars that make traditional transplantation difficult
  • Need additional density after a natural transplant
  • Prefer a cosmetic solution without waiting months for hair growth

The procedure can also benefit individuals who are completely bald and want a fuller appearance without relying on natural hair availability.

However, even suitable candidates should undergo a tolerance test to ensure their body accepts the synthetic fibers.

Who Should Avoid Biofibre Hair Transplants?

Biofibre hair transplants are not ideal for everyone. People with certain scalp conditions or medical concerns may face a higher risk of complications.

Because synthetic fibers are implanted into the scalp, proper healing and scalp health play a major role in success.

You may not be a suitable candidate if you have:

  • Active scalp infections
  • Chronic inflammatory scalp diseases
  • Autoimmune disorders affecting hair growth
  • Severe skin sensitivity
  • A history of implant rejection
  • Poor wound healing

People seeking permanent natural hair growth should also consider alternatives. Biofibre hair does not grow naturally and requires ongoing maintenance.

A consultation with a qualified specialist helps determine whether the treatment aligns with your goals and health profile.

How Does a Biofibre Hair Transplant Procedure Work?

The procedure usually begins with a detailed consultation, followed by scalp preparation, implantation and post-treatment care. Each step plays an important role in improving results and supporting proper healing.

Your journey starts with a detailed consultation with a qualified biofibre hair transplant doctor, who reviews your hair loss history, examines scalp health and evaluates whether you are a suitable candidate for the procedure. 

The procedure commonly includes the following steps:

1. Pre-Procedure Preparation:

You may follow a special routine for scalp care before the procedure. Good scalp health remains vital for a successful transplant.

2. The Implantation:

During the procedure, the specialist uses hooked needles to implant the fibers into your scalp. Because the fibers lack a natural root, the specialist places them deeper to prevent early shedding.

3. Post-Procedure Care:

Right after the surgery, you follow a strict aftercare routine. Your doctor advises you on how to wash your hair and protect the implanted area from infection. Your doctor can prescribe a 7-day course of antibiotics to reduce the risk of infection.

4. Follow-Up Treatments:

It takes around 20 to 30 days for the fibers to anchor in the scalp. To achieve your desired density, you may need follow-up sessions every five weeks. Over time, about 10% of the fibers shed annually, so you may require yearly touch-ups.

Safety and Tolerance

All biofibre hairs meet a high safety standard. They receive a safety grade of VI on the medical polymer scale, which means they are completely safe for hair restoration when implanted properly. 

However, because biofibre hair is synthetic, your body might reject the implants.
For this reason, your doctor recommends a tolerance test before the procedure. This test ensures that your body will accept the synthetic fibers without any adverse reactions.

Immediate and Long-Term Results

One main attraction of the biofibre hair transplant is that you see immediate results. Unlike other methods that require months of waiting for transplanted follicles to grow, biofibre implants give you a fuller look on the same day as the procedure. However, because the fibers are synthetic, they do not grow like natural hair, and you must perform regular maintenance.

Pros and Cons of Biofibre Hair Transplants

Biofibre hair transplants provide immediate cosmetic results and do not require donor hair, making them attractive for people with advanced hair loss. However, because the implanted fibers are synthetic, they require ongoing maintenance and may not suit everyone.

Understanding both the advantages and limitations can help you decide whether this hair restoration option aligns with your expectations and long-term goals.

Pros:

  • Immediate Results
  • No Donor Area Needed
  • Durable Appearance
  • Minimal Downtime

Cons:

  • The fibers shed over time (about 10% per year), so you need regular touch-ups.
  • Once cut, the fibers do not grow back, which means any trimming is a permanent change.
  • You cannot bleach or dye the fibers, which may trouble you if you like to change your hair color.
  • Although rare, your body may reject synthetic implants. A tolerance test remains crucial to prevent this.
  • To prevent infection and ensure proper anchoring, you must follow a strict aftercare routine.

Biofibre Hair Transplant Cost in Jaipur

The cost of biofibre hair transplant in Jaipur can vary depending on the number of grafts required, treatment goals and the overall extent of hair loss. At ALCS Clinic, treatment recommendations are personalized after evaluating scalp condition, coverage requirements and individual expectations. Since every case differs, the overall biofibre hair transplant cost may vary from person to person.

Several factors can influence the final treatment cost, including:

  • Number of grafts required
  • Severity and pattern of hair loss
  • Desired hair density and coverage area
  • Doctor’s experience and expertise
  • Technique and implantation planning used
  • Clinic location and treatment facilities
  • Follow-up care and maintenance sessions

Biofibre Hair Transplant Risks

However, like any scalp procedure, there is a small risk of complications, such as infection or implant rejection.

Most patients experience only mild side effects after a biofibre hair transplant, and these usually resolve within a few days. Common risks include:

  • Mild Redness: Temporary redness around the implanted area is common immediately after the procedure and usually fades within a few days.
  • Scalp Swelling: Some patients notice slight swelling or tenderness around the treated area. This reaction is usually mild and improves with rest and proper care.
  • Minor Discomfort: Mild soreness or scalp sensitivity can occur during the healing period, particularly in the first few days.
  • Itching During Healing: As the scalp recovers, some individuals may experience temporary itching. Avoid scratching because this may disturb newly implanted fibers.
  • Risk of Infection: In rare cases, approximately 2% of patients may develop infections that can require fiber removal. This risk is one reason doctors generally prescribe a short course of antibiotics.
  • Implant Rejection: Because biofibre hair uses synthetic fibers, some individuals may experience rejection reactions. A tolerance test before the procedure helps reduce this possibility.

Following your surgeon’s aftercare instructions, taking prescribed medications, and avoiding scalp irritation can significantly reduce the likelihood of complications and improve long-term results.

How to Maintain Biofibre Hair Long-Term?

Biofibre hair requires ongoing care because synthetic fibers do not behave like natural hair. Proper maintenance helps preserve appearance and reduce unnecessary shedding.

Although the results appear immediately, long-term success depends heavily on your daily habits and follow-up care.

Helpful maintenance practices include:

  • Wash hair gently using recommended products
  • Avoid aggressive rubbing during drying
  • Use soft brushes or wide-tooth combs
  • Avoid strong chemical products
  • Protect the scalp during contact sports
  • Attend follow-up appointments regularly

Because approximately 10% of implanted fibers may shed each year, periodic maintenance sessions are usually recommended.

Read More:

What Is Bio FUE Hair Transplant?

Why FUE Implantation is Preferred Over FUT

10 Reasons to Opt for FUE Hair Transplant

Common Mistakes After a Biofibre Hair Transplant

The most common mistakes after a biofibre hair transplant include ignoring aftercare instructions, touching the scalp too early, and skipping follow-up care. These errors can increase the risk of infection, irritation, and premature fiber shedding.

Many patients focus on achieving immediate cosmetic results but overlook the importance of long-term maintenance. Proper healing and fiber anchoring depend heavily on following your specialist’s guidance during recovery.

Common mistakes include:

  1. Touching the Scalp Too Soon: Repeated touching can disrupt newly implanted fibers before they anchor properly.
  2. Using Harsh Hair Products: Strong shampoos and chemical products may irritate the scalp.
  3. Skipping Prescribed Medication: Antibiotics help reduce infection risk and should be taken exactly as instructed.
  4. Returning to Exercise Too Quickly: Heavy sweating and friction may interfere with healing.
  5. Missing Follow-Up Sessions: Regular evaluations allow specialists to monitor healing and maintain density.

Following post-procedure instructions carefully helps improve long-term outcomes.

Biofibre Hair Transplant Success Rate

Studies and clinical observations show that the success rate for biofibre hair transplants ranges between 95% and 98%. Experienced specialists achieve this high success rate when you adhere to the recommended aftercare routine.

However, a small percentage of cases see rejection or extraction of the fibers due to infection. Therefore, a tolerance test before the procedure remains important to ensure that your body accepts the synthetic implants.

Biofibre vs. Natural Hair Transplants

Biofibre and natural hair transplants differ mainly in the type of hair used and long-term maintenance. Natural transplants use living hair follicles that continue growing, while biofibre transplants use synthetic fibers that provide instant results but require periodic replacement.

It remains important to understand how biofibre hair transplants differ from natural hair transplants. Here is a simple comparison:

Natural Hair Transplants

Transplants involve moving healthy hair follicles from one part of your scalp to another. The transplanted hair grows naturally because it has a living root.

  • Appearance: The hair blends seamlessly with your existing hair and ages naturally, including greying over time.
  • Maintenance: Once transplanted, the natural hair continues to grow and requires normal hair care routines. You do not need regular re-implantation.

Biofibre Hair Transplants

Instead of moving natural follicles, your specialist implants synthetic fibers directly into the scalp using hooked needles.

  • Appearance: Biofibre hairs come in various colors and lengths and do not grey or change with age. However, they cannot grow or be altered like natural hair.
  • Maintenance: You must replace the fibers periodically, as they shed at about 10% per year, and the procedure requires strict aftercare.

Conclusion

A biofibre hair transplant offers an immediate solution for those who look to address hair loss. It especially appeals if you seek a quick improvement without relying on donor hair. The procedure provides instant results and a controlled appearance, which makes it a popular choice for many individuals. However, you must weigh the pros and cons before making your decision.

Frequently Asked Questions (FAQs)

Is a biofibre hair transplant permanent?

No, a biofibre hair transplant is not completely permanent. Synthetic fibers gradually shed over time, with approximately 10% of implanted fibers lost annually, which means maintenance or touch-up sessions may be required.

How long does it take to recover after a biofibre hair transplant?

Most patients recover within a few days, while the implanted fibers usually take around 20-30 days to anchor securely into the scalp. Following aftercare instructions is important for proper healing.

Can biofibre hair be cut, styled, or dyed?

Biofibre hair can be cut and styled, but once trimmed, it does not grow back. The fibers also should not be dyed or bleached, so selecting a suitable color before treatment is important.

Is a biofibre hair transplant painful?

The procedure generally causes minimal discomfort because specialists perform it under local anesthesia. Some patients may experience mild redness or scalp sensitivity for a few days after treatment.

Who is the ideal candidate for a biofibre hair transplant?

People with limited donor hair, extensive baldness, scalp scarring, or those seeking immediate cosmetic improvement are considered good candidates for a biofibre hair transplant. A consultation and tolerance test help determine suitability.

Essential Tips for Preventing and Healing Folliculitis Scarring

many people, folliculitis damages self-esteem because of its appearance. 

Although the condition often goes away on its own, repeated outbreaks or severe infections can leave scars. In this article, we share essential tips for preventing and healing folliculitis scarring. 

Folliculitis and Its Scarring

Folliculitis begins when bacteria, yeast, or other irritants invade a hair follicle. These tiny pockets in your skin support each hair and contain oil glands. When germs settle in a follicle, the area turns red, swells, and fills with pus. In some cases, this produces small bumps that cause itching and pain.

Different types of folliculitis exist. The most common form results from the bacteria Staphylococcus aureus. Another well-known type is “hot tub” folliculitis, which the bacterium Pseudomonas aeruginosa causes as it thrives in warm, moist areas like hot tubs. 

Some people also experience folliculitis from yeast, which resembles an acne breakout, especially on the upper chest and back. Shaving-related folliculitis, such as pseudofolliculitis barbae, happens when the hair curls back into the skin, causing irritation and bumps.

Repeated inflammation or deep infections damage the skin and form scars. These scars vary in appearance. Some appear small and barely noticeable, while others stand out more. Scarring from folliculitis may show up on the face, arms, upper back, lower legs, or even the scalp. This guide focuses on tips for preventing these scars and healing them if they have already formed.

Preventing Folliculitis Scarring

The best approach to folliculitis scars is to stop them from forming. Simple steps in your daily routine can protect your skin from lasting damage.

Keep Your Skin Clean

Wash your skin regularly with a gentle cleanser to remove dirt, sweat, and oil. Keeping your skin clean reduces the bacteria count that can cause infection. Focus on areas prone to folliculitis, such as where you shave or where you sweat a lot.

Use Antibacterial Cleansers

If you struggle with folliculitis, consider using an antibacterial cleanser. These cleansers lower the bacteria count on your skin and help prevent infections. Choose a cleanser that remains gentle so it does not dry out your skin.

Avoid Over-Shaving

Frequent shaving irritates hair follicles and triggers inflammation. If you must shave, soften your hair first with warm water. Shave in the direction of hair growth and use a clean, sharp razor. For those who suffer from razor bumps or pseudofolliculitis barbae, try using an electric razor or hair removal creams instead.

Check Your Hot Tub and Pool Conditions

Hot tubs, pools, and other warm water sources breed bacteria. Before using a hot tub or pool, verify that the chemicals maintain proper levels. After swimming, take a shower to wash off any germs that may have settled on your skin.

Wear Breathable Clothing

Tight, non-breathable fabrics trap sweat and heat, which can lead to folliculitis. Choose loose-fitting, breathable clothing, especially when you exercise. This habit keeps your skin dry and lowers the chance of irritation.

Limit Excessive Sweating

When you work out or spend time outdoors, keep your skin as dry as possible. After heavy sweating, change your clothes and shower. This habit reduces the time your skin stays exposed to sweat, which can encourage bacterial growth.

Do Not Pick or Scratch

It may be tempting to pick at bumps or scratch itchy areas, but touching these spots worsens the infection and increases the chance of scarring. Let the bumps heal naturally, and use anti-itch creams to ease discomfort if needed.

Healing Folliculitis Scars

If scars from folliculitis already exist, many methods can help your skin heal and reduce their appearance. Healing takes time, but proper care brings noticeable improvements.

Use Topical Treatments

Topical treatments fade scars and improve skin texture. Look for creams or gels that include ingredients like:

  • Silicone gels or sheets reduce the appearance of scars over time.
  • Vitamin C brightens your skin and encourages collagen production, which smooths scars.
  • Retinol boosts skin cell turnover and lessens scar appearance. Use retinol creams at night, and protect your skin from the sun during the day.
  • Alpha Hydroxy Acids (AHAs) gently exfoliate your skin, remove dead cells, and promote new cell growth.

Consider Laser Treatment for Folliculitis Scars

Laser treatment proves a powerful tool for scar reduction. Different types of lasers target scar tissue and help smooth your skin. Laser treatments remove the top layers of skin and encourage new, healthy skin cells to form. This process significantly reduces the appearance of scars over time. Laser treatment offers an effective option for those with more stubborn marks.

Before choosing laser treatment, consult with a skin care specialist to determine if it suits you. The specialist discusses potential benefits, the number of sessions needed, and the cost. Remember that results take time and multiple sessions might be necessary.

Try Microneedling

Microneedling uses tiny needles to create small punctures in your skin. These micro-injuries stimulate collagen production, which improves the look of scars. Many people ask, “How do I remove folliculitis scars?” Microneedling encourages your skin to heal and become smoother.

When you try microneedling, use a device that is safe and approved. You can perform this treatment at a clinic or use a home device if it is safe. Always follow the instructions to avoid further irritation.

Use Chemical Peels

Chemical peels remove the outer layers of your skin to reveal newer, smoother skin underneath. They work by applying a chemical solution that gently exfoliates the damaged skin. This process lessens the appearance of scars and evens out skin tone. Chemical peels suit people with shallow scars, though deeper scars may require more intensive treatments like laser therapy or microneedling.

Consider Natural Remedies

Some natural remedies help fade scars, though they may work more slowly than medical treatments. Options include:

  • Aloe vera gel soothes your skin and aids healing. Apply fresh aloe vera to the affected area daily.
  • Honey has natural antibacterial and healing properties. Use raw honey as a mask on your scars.
  • Coconut oil moisturizes your skin and may help reduce the appearance of scars over time.
  • Lemon juice acts as a natural bleach. Use it with caution because it makes your skin more sensitive to the sun. Always dilute lemon juice with water before applying it.

Special Considerations for Folliculitis Scars on the Scalp

Folliculitis can also affect your scalp, and scars in this area cause extra trouble. Scarring scalp folliculitis may lead to hair thinning or patchy hair loss. Here are some tips specifically for handling scalp scars:

Keep the Scalp Clean

Wash your scalp regularly with a gentle shampoo to remove oils and dirt. A clean scalp reduces the risk of new infections or worsening existing scars.

Use Medicated Shampoos

Medicated shampoos fight bacteria and reduce inflammation on your scalp. Look for products designed for skin conditions, and follow the instructions for best results.

Be Gentle When Brushing

Use a soft brush and avoid harsh brushing techniques. Handle your scalp gently to prevent further irritation and allow scars to heal.

Explore Laser and Light Therapies

Laser treatments also work well on the scalp. Laser scar removal treatments reduce the appearance of scars on your scalp by targeting scar tissue and promoting the growth of healthy skin and hair.

Lifestyle and Self-Care Tips for Healing

Healing from folliculitis scars involves treatments and taking care of your overall health. Follow these lifestyle tips to support your skin’s healing process:

  1. Drink plenty of water to keep your skin moist and support healing. Aim for at least eight glasses of water each day.
  1. Your skin benefits from a balanced diet. Eat plenty of fruits, vegetables, lean proteins, and whole grains. Foods rich in vitamins A, C, and E repair your skin and boost collagen production, which is essential for scar healing.
  1. Sleep gives your body time to repair itself. Aim for 7–8 hours of sleep each night. A good sleep schedule speeds up your skin’s healing and improves your overall health.
  1. High stress levels slow your body’s healing process. Practice stress management techniques like deep breathing, meditation, or light exercise. Staying relaxed helps your body repair skin and reduces the chance of new breakouts.
  1. Sun exposure darkens scars and makes them more noticeable. Use a broad-spectrum sunscreen with at least SPF 30 every day, even when it is cloudy. Wearing a hat or protective clothing also prevents your scars from darkening.
  1. Smoking and heavy drinking slow the healing process. These habits reduce your skin’s ability to repair itself and worsen scars. Quitting smoking and cutting back on alcohol improve your overall skin health.

When to Seek Professional Help

Most cases of folliculitis and minor scarring you can manage at home with proper care. However, if your scars are severe or your skin does not improve with over-the-counter treatments, seek professional help. A skin care specialist can assess your condition and recommend treatments tailored to your needs.

For some people, persistent folliculitis or deep scars require advanced treatments like laser therapy, microneedling, or chemical peels. A professional guides you on the safest and most effective methods for reducing the appearance of scars.

Conclusion

Folliculitis can be a painful and frustrating condition. Its appearance and discomfort lower your confidence. However, you have many tools to prevent folliculitis from leaving lasting scars. Keep your skin clean, practice gentle hair removal, and avoid triggers like hot tubs with low disinfectant levels to reduce your risk of scarring.

 Receding Hairline: Stages, Causes, and Prevention

Hairline, it’s a natural part of life. In this article, we shall discuss the course of a receding hairline.

Discuss the different treatments and daily habits that can be used to cope with it, analyzing the cause that may be causing it, both in the early signs and in the later stages of complications.

What is a Receding Hairline?

A receding hairline occurs when the hair covering the front part of the head becomes thin and moves towards the back. This is usually among the initial symptoms of patterned baldness. The fact is that hair loss is normal as we age, but it may sometimes also serve as an indicator that there is something else that is happening, e.g., a health problem or even lifestyle.

In numerous men, the true loss of hair begins unobtrusively at the temples and eventually takes the shape of what is commonly referred to as the M shape. Instead of a frontal recession, women tend to observe more diffuse thinning of the crown or frontal hair loss female. Nevertheless, these variations do not imply that the two trends are not crucial to individual attitudes toward their looks and self-esteem.

Stages of a Receding Hairline

Having a receding hairline does not occur overnight; it is a progressive process that goes through different phases of hair loss and receding hairline. Knowing these phases can enable you to observe the process early in advance and think of getting some advice or treatment before it is too late.

Stage 1: Little or No Observable Loss

Even on the first day, the change is so minor that you might just observe some thinning on your temples or hair loss around hairline, or a slightly opened part. It may be far-fetched, but it may be a patterned hairline hair loss.

Stage 2: Noticeable Temple Recession.

This is where the hairline starts to recede more prominently, primarily at temples. This begins to assume an uneven shape in many men and at some point might resemble an M, a typical symptom of frontal hair loss. Their middle section may start to enlarge slowly, and it may create an illusion of hair loss on the top of the head or front middle hair loss.

Stage 3: Deepening Recession

By this point, the alterations are even more noticeable. Men tend to notice another recession during the temples, where the M shape is even more noticeable, and the thinning may begin at the top of the head. It is the phase when the receded zones start to blend with the developing bald spots.

Stage 4: Expansion of Hair Loss

The hairline is no longer a temple issue; the thinning starts to take off towards the top. The distance between the hairline and the rest of the hair on the crown becomes even clearer.

Stage 5 and Above: Advanced Balding

At advanced stages, loss of hair is widespread. Men may also have their hair located mostly at the sides and back of the head, but leave the center bald. In women, although full baldness does not exist, the resulting thinning may cause a generally thin look on the top of the head. It may be essential to identify these stages promptly because early intervention may contribute to deceleration.

Causes of a Receding Hairline

The causes of a receding hairline can be very numerous. Others have genetic and aging causes, whereas others are caused by hormones, lifestyle changes, or even by some medications that lead to hair loss and receding hairline. Learning about the possible causes of your loss of hair is a way to strengthen yourself to take wise actions to resolve it.

Aging

With age, our hair follicles produce thinner and shorter hair. This, over time, may lead to dwindling hair density and eventual hairline hair loss. Research has indicated that over 50 per cent of male citizens aged over 50 report some loss of hair, and the figures are bound to increase further by the age of 70. In women, after menopause, thinning may become noticeable when hormonal changes become activated.

Hormonal Changes

Hormones are important in the growth of hair. In men, a hormone, dihydrotestosterone (DHT), has the potential to affect the natural growth cycle, such that the growth phase becomes shorter and the hair becomes finer or ceases to grow completely. This hormonal influence is the cause of a receding hairline in many.

Family History and Genetics

The other large piece of the puzzle is genetics. When hair loss is in your family, there are high chances that you too may suffer the same pattern. Men whose relatives were found to be bald tend to develop a receding hairline in the same direction as their parents or grandparents.

Medications and Treatments

Hair loss is a side effect of certain medications. A good case in point is chemotherapy, which commonly leads to serious shedding of hair. The hair follicles also may be impacted by other medications, such as hormone therapy, or to treat other medical problems, causing a receding hairline.

Illness and Stress

In other cases, a stressful episode or a severe disease can provoke a form of temporary alopecia called telogen effluvium. With this condition, the number of hairs to enter the resting phase of a growth cycle is more than normal, and the hairs quickly shed off. The good news is that such a form of hair loss is typically reversible, and the hair will regenerate with time.

Lifestyle Factors

Your hair health can also be affected by everyday decisions. Indicatively, smoking has been associated with early hair loss since the toxins may lower the blood flow to the scalp follicles and induce oxidative stress. Having a bad diet that does not contain nutritious vitamins and minerals may also make your hair weak and more likely to experience hair loss around the hairline.

Treatment Options for a Receding Hairline

Although there is no magic pill that will fix a receding hairline, there are indeed various treatments that can be used to delay the process and even possibly stimulate some hair growth. In many cases, medical therapy followed by lifestyle changes and proper care of the hair can lead to the best outcomes.

FDA-Approved Medications

Finasteride and minoxidil are two drugs that have been clinically used to treat patterned hair loss in the United States of America. Finasteride acts by reducing the level of DHT, whereas minoxidil increases blood circulation to the hair follicles that could facilitate hair growth. The effects of these treatments are felt by many individuals who use them regularly over several months, particularly in hairline hair loss and hair loss front.

Surgical Options and Hair Transplants.

Should people with a serious instance of hair loss want to look into it, surgical procedures such as hair transplants can be an option. This is the process of transferring healthy hair follicles to regions where there has been loss or thinning of hair. It is more invasive, but a skilled professional would be able to obtain long-term and natural-appearing results in many cases.

Alternative and Natural Remedies.

Certain studies, especially animal ones, indicate that the application of certain essential oils, such as peppermint and lavender, could aid in hair growth. Nevertheless, additional research is required to demonstrate their efficacy in humans. Before attempting any other form of treatment, consulting a healthcare provider is always the best choice.

Lifestyle Choices and Hair Care

Hair care goes beyond medical care. Basic everyday routines and proper hair management can go a long way in maintaining what you do have and halting any additional hair loss and receding hairline.

Changing Hairstyles

A new haircut sometimes helps to control a receding hairline. Styles such as a slicked-back back-cut or a close buzz cut can often hide the points where the hair is thinning and help give you a good self-esteem boost as you wait to see which other treatments work best.

Reducing Stress

Hair loss is a familiar cause of stress. Stress can be lowered through regular exercise, enough sleep, and meditation. Stress management may preserve your natural hair growth schedule, decrease front middle hair loss, and enhance your well-being.

Nutritional Support

Having healthy hair entails a balanced diet with essential nutrients. Vitamins and minerals, including vitamin D, iron, and biotin, are very important in maintaining the strength of your hair.

Gentle Hair Care Practices

A soft treatment of your hair avoids further damage. This may include making sure to wear natural hair products, not using harsh chemicals, and reducing the use of heat styling. Even a simple task such as brushing your hair can help decrease the amount of stress on your hair follicles and prevent hair loss front.

Frequently Asked Questions

Is a receding hairline regainable?

It cannot fully cure a receding hairline, but medications such as finasteride and minoxidil help delay it, and maybe some hair will regrow.

What is the age when a receding hairline can start?

The loss of hair may begin during or following puberty or at any age during adulthood. At what age it may start is a matter of genetics, hormonal shifts, and lifestyle choices, among others.

Why does hair fall out in young adults?

Causes of hair loss among even young adults include stress, hormonal changes, and family history. Particular health problems or medications may also be the cause in other instances.

Conclusion

A receding hairline is an aspect of aging that is natural to both men and women, but may manifest differently. In most cases, it begins at the temples and eventually develops an M-shape, although in women, more general thinning at the top begins to be felt, including frontal hair loss female patterns. The only thing to do is be active, consult in time, and select the approaches that best suit your circumstances.

All You Need to Know About the Latest Hair Transplant Technology

air loss is very common and can occur due to various reasons. It can be a very emotional and challenging experience. In India, concerns like pattern baldness and general hair fall are increasingly common, causing worry and affecting self-esteem. Fortunately, modern medicine now offers hair transplantation solutions that bring hope and restore confidence to countless individuals.

In this guide, we’re going to walk you through everything you need to know about hair transplant surgery. We’ll cover what the procedure involves, look at the most advanced techniques available today, and discuss the key factors that contribute to a successful hair restoration outcome. 

What Is Hair Transplant Surgery?

Hair transplant surgery is a specialized procedure designed to help restore hair growth in areas where hair is thinning or missing. The idea is simple: healthy hair follicles are taken from a part of your head that has a good supply of hair, typically the back or the sides and are carefully moved to the balding or thinning spots. Once these follicles are transplanted, they start growing hair naturally, offering long-term improvement in the appearance of your hair.

In recent years, hair transplantation has come a long way. Thanks to technological advances, the methods used today are much less invasive than in the past. These improvements mean that recovery times are shorter, discomfort is minimized, and the final results look much more natural.

Advanced Hair Transplantation Techniques

There are several innovative techniques in use today, each offering its own benefits and considerations. Let’s take a closer look at the most common methods.

1. Follicular Unit Transplantation (FUT)

Also known as the strip method, Follicular Unit Transplantation (FUT) is one of the traditional methods used worldwide. Here’s how it works: a surgeon removes a narrow strip of skin from the donor area, usually at the back or the sides of your head. Under a microscope, individual hair follicles are meticulously extracted from this strip, and then they’re transplanted to the areas where you’re experiencing hair loss.

Advantages of FUT

  • It tends to be more cost-effective compared to some newer techniques.
  • It allows for the transplantation of a large number of hairs in one session, which can be beneficial if you need significant coverage.

Disadvantages of FUT

  • The process leaves behind a linear scar in the donor area, which can be an issue if you prefer shorter hairstyles.
  • There might be more discomfort during recovery, and the healing process can take longer compared to less invasive methods.

2. Follicular Unit Extraction (FUE)

Follicular Unit Extraction, or FUE, is a modern alternative that has gained a lot of popularity. Unlike FUT, FUE involves extracting individual hair follicles directly from the donor area using a tiny punch tool. These follicles are then individually implanted into the balding or thinning regions.

Advantages of FUE

  • The procedure is less invasive, which means there is minimal discomfort during and after the surgery.
  • There are no linear scars, so you can style your hair short without worrying about visible marks.
  • The recovery period is generally shorter, allowing you to return to your regular routine faster.

Disadvantages of FUE

  • It can be more expensive than FUT because it is a more time-intensive process.
  • Covering a large balding area might take longer compared to FUT due to the individual extraction method.

3. Platelet-Rich Plasma (PRP) Therapy

PRP therapy isn’t a transplant method by itself, but it’s an effective supplementary treatment that can enhance hair growth. In PRP, a small sample of your blood is taken and spun in a centrifuge to separate the platelet-rich plasma from the rest of the blood. This plasma, which is rich in growth factors, is then injected into your scalp to stimulate dormant hair follicles.

Advantages of PRP Therapy

  • It’s minimally invasive and considered very safe.
  • The procedure is quick and usually causes little discomfort.
  • It naturally boosts hair growth and thickness.

Disadvantages of PRP Therapy

  • You usually need multiple sessions to see significant results.
  • It may not be as effective for individuals with extensive hair loss or severe baldness.

4. Stem Cell Hair Transplant

Stem cell hair transplantation is one of the most exciting advancements in the field of hair restoration. This technique starts with extracting a small number of hair follicles from the donor area. These follicles are then taken to a laboratory where they’re multiplied or cloned, increasing the number of hair follicles available for transplantation. After this process, the cloned follicles are implanted into the areas that need hair.

Advantages of Stem Cell Transplants

  • This method can potentially offer a higher hair density and more coverage.
  • The cloning process means that, in theory, you could have an almost unlimited supply of hair follicles for transplantation.
  • It is minimally invasive, with reduced chances of noticeable scarring.

Disadvantages of Stem Cell Transplants

  • The technique is still relatively new, so it might not be available in all regions.
  • It tends to be more expensive compared to traditional methods.

5. Automated NeoGraft Hair Transplantation

Automated NeoGraft is a high-tech evolution of the FUE technique. Instead of manually extracting hair follicles, this method uses a specialized automated device that does the job quickly and efficiently. This device not only speeds up the extraction process but also helps in implanting the follicles, reducing the overall duration of the procedure.

Advantages of Automated NeoGraft

  • The procedure is faster and highly precise.
  • There is less manual handling of the follicles, which minimizes the risk of damage.
  • It leads to minimal scarring, less pain, and reduced downtime during recovery.

Disadvantages of Automated NeoGraft

  • The technique requires specialized training and equipment, which can drive up the cost.
  • It may not be suitable for every type of hair loss or every hair type.

6. ARTAS Robotic Hair Transplantation

ARTAS robotic hair transplantation takes the innovation one step further by integrating robotics and artificial intelligence. In this method, a robotic system scans your scalp, identifies healthy hair follicles, and extracts them with remarkable precision. It then assists the surgeon in implanting these follicles into the thinning or balding areas.

Advantages of ARTAS

  • It offers high precision and accuracy in both extraction and implantation.
  • The risk of scarring and discomfort is minimized, and the procedure tends to be very gentle on the scalp.
  • Recovery times are typically faster due to the reduced trauma involved.

Disadvantages of ARTAS:

  • The system is expensive, which means the overall cost of the procedure is higher.
  • Its availability might be limited to specialized clinics, and it requires surgeons who are trained in using robotic systems.

7. BioGraft Hair Transplantation

BioGraft is a unique technique that combines elements of traditional methods like FUT or FUE with advanced technology to ensure that the transplanted hair blends seamlessly with your existing hair. The focus here is on achieving a natural look by carefully aligning the texture, density, and growth direction of the new hair with what you already have.

Advantages of BioGraft

  • The results are incredibly natural-looking, as the transplanted hair integrates well with existing hair.
  • This technique provides enhanced styling flexibility because the hair appears uniform and well-blended.
  • It can be particularly appealing for those looking for a subtle change that still makes a big difference.

Disadvantages of BioGraft

  • It requires a high level of skill from the surgeon, as the technique is quite meticulous.
  • The advanced technology and expertise involved can lead to higher costs compared to standard methods.

Factors That Influence the Success of Hair Transplant Surgery

The success of a hair transplant isn’t just about the technique used; several other factors play a significant role:

1. Choice of Transplant Method

Each hair transplantation method has its own set of benefits and limitations. It’s important to have an in-depth discussion with a hair restoration specialist who can help determine which method is best suited to your individual needs and the specific pattern of your hair loss.

2. Skill and Experience of the Surgeon

The surgeon’s expertise is one of the most critical elements in ensuring a successful transplant. Look for a specialist with extensive training in hair restoration and a solid track record of successful procedures. A skilled surgeon can make a huge difference in the final outcome.

3. Quality of Infrastructure and Technology

The facilities where the procedure is performed also matter a great deal. Clinics equipped with the latest medical devices and technology tend to offer more consistent and satisfactory results. The better the technology, the less invasive the procedure is likely to be, and the smoother your recovery will be.

4. Patient’s Post-Operative Care

After your surgery, following your doctor’s instructions to the letter is vital. Proper aftercare including the right medications, careful handling of your scalp, and adherence to hygiene protocols can make the difference between a successful transplant and potential complications.

Tips to Ensure Successful Hair Transplant Outcomes

Here are some practical tips that can help you get the best possible results from your hair transplant:

  • Don’t hesitate to seek second opinions. Meeting with several experts can help you choose a surgeon whose experience and approach you trust.
  • Whether it’s taking medications on time, following dietary recommendations, or avoiding strenuous activities, sticking to your post-surgery plan is crucial.
  • Remember that hair restoration is a process. It might take several months before you see the full results, so patience is key.

Conclusion

Hair transplantation has seen remarkable advancements in recent years, offering a range of options from the traditional FUT to the cutting-edge ARTAS robotic systems. Each technique from FUE and PRP therapy to stem cell transplants and automated NeoGraft has its own unique advantages and considerations. You can find a solution that fits your needs and helps restore not just your hair, but your confidence by understanding these methods and working with experienced professionals. 

The journey to overcoming hair loss isn’t just about the surgery but it’s about making informed choices, taking care of your overall health, and following your doctor’s advice before and after the procedure. 

What Is breast Reduction?

Breast reduction surgery is a method to reduce large breasts by removing excess fat and skin from your breast. Overdeveloped breasts can often cause neck and back pain, and you may undergo breast reduction surgery to reduce the pain and discomfort. The surgery is beneficial for women with large breasts. Moreover, men with gynecomastia can also choose to undergo this treatment.

Breast reduction, also called breast reduction, is an operative procedure, and hence, you must understand its pros and cons and the process in detail. A detailed discussion with your surgeon will let you know ‘what is boob reduction?’

What to know about breast reduction surgery?

The treatment process starts with a consultation round with your surgeon. First, your surgeon may ask you about your breast health. Then, they will have a look at your medical history to check your suitability for the operation.

It is recommended not to hide anything from your healthcare provider. You can discuss your issues and the need for breast reduction surgery. The consultation round will help you get comfortable and open up regarding any concerns you may have. Your surgeon may measure your breast and discuss your expectations from the surgery.

It is suggested that you talk to your surgeon confidently and explain your goals to them. It will help you and your surgeon during the treatment process. You will also get an explicit picture and an answer to ‘what does breast reduction surgery look like?’

How to prepare yourself for the surgery?

Once you have understood what is breast reduction surgery and cleared your doubts about the process, you need to prepare for the surgery. You must listen to your surgeon’s advice attentively to get a speedy recovery. For a quick recovery, it is suggested to maintain an ideal physical shape.

In addition, you need to take precautionary home remedies for the recovery process. You can keep these things handy:

  • Ice
  • Gauze and clean washcloths
  • Loose-fitting clothes
  • Towels
  • Medicated ointment and creams prescribed by your surgeon

Moreover, it is recommended to arrange for travel to and from the hospital. You may ask your friends or relatives to accompany you during your hospital stay. If you need to travel to another city for your surgery, it is advised to take your friends or family members with you.

What happens during breast reduction surgery?

The surgical process starts with giving anaesthesia that numbs the area and reduces pain and discomfort. Depending upon your situation, the surgery can take anywhere between 2 to 5 hours to get completed. The primary breast reduction surgery methods include:

Liposuction

If you want a slight reduction in your breast size, your surgeon may recommend liposuction. In this process, your surgeon makes minor cuts on your skin to insert a thin tube in your breast area. The tube pulls excess fat and tissues from your breast region.

Vertical or lollipop

If you need a moderate reduction in your breast size, you may need to undergo a vertical or lollipop procedure. It also works on saggy breasts and uplifts them. Under this process, your surgeon will make minor cuts around your areola and breast crease. These cuts are used to remove excess fat deposits around the breast area, which helps reshape your breasts.

Inverted T or anchor

It is beneficial for uneven breast shape and provides a better and uplifted shape to your breast. The surgical procedure is carried for a significant reduction in breast size. Your surgeon will start the process by cutting around your areola to underneath your breast. Then, the excess fat is removed to reduce the breast size.

These are the three main procedures for breast reduction surgery. Your surgeon will decide the best method according to the shape and size of your breasts. After the process, you may need to wear a surgical bra for a few days.

Recovery process

It is recommended to take a week off from your professional and personal commitments. Your recovery process depends on your physical fitness. However, the recovery duration can vary from person to person. In addition, you need to visit your surgeon to remove the bandages and stitches.

After the surgery, you may experience breast pain. Hence, it is suggested to take the prescribed painkillers in the required dosages. In addition, you must stay away from physical exercises and heavy weightlifting.

For more information on recovery, post-surgical care, and detailed knowledge on breast reduction, you may contact ALCS Clinic.

Hard Water Hair: Treat Damage, Prevention, and Washing Tips

Introduction

Many areas including Delhi experience hard water as the water supply contains high levels of calcium and magnesium minerals. The presence of hard water creates no health risks but severely damages hair quality through dryness and breakage and flatness of the hair. Protecting your hair requires both an understanding of hard water effects and proper preventive methods.

Signs Your Hair Is Damaged by Hard Water

Early detection of hard water damage enables proper and timely response measures.

  • Common Indicators:
  • Dryness and brittleness
  • Frizz and tangles
  • Dull or lifeless appearance
  • Scalp irritation or flakiness
  • Colour fading or brassiness
  • Increased hair breakage​

Mineral buildup blocks moisture absorption and makes hair strands less sturdy, and this leads to noticeable symptoms. ​

How Hard Water Causes Hair Damage

High mineral content in hard water forms deposits on your hair shaft and scalp surface. A buildup of substances forms a layer that stops moisture and essential nutrients from entering the hair shaft. Over time, this leads to:​

  • Weakened hair structure
  • Reduced elasticity
  • Increased susceptibility to breakage
  • Scalp issues like dryness and irritation​

Mineral deposits found in hard water create trouble for hair products by reducing their effectiveness. ​

Effective Treatments for Hard Water Hair Damage

Hard water damage treatment consists of mineral removal combined with proper hair restoration practices.​

Treatment Options:

  • Chelating shampoos: Include active agents which form bonds with mineral particles to extract them from the hair.
  • Clarifying Shampoos: Apply with the goal of deep cleansing just once per week to remove residual products.
  • Deep Conditioning Masks: Replenish moisture and repair damage with intensive treatments.
  • Leave-In Conditioners: Maintain hydration levels throughout the day by protecting hair from both heat damage and daily harm.​

By using these treatments on a regular basis, you gain noticeable improvements in hair health and strength.

Natural Remedies to Restore Hair Health

The application of natural remedies serves as a valuable addition to conventional hair care routines to deliver effective results without harshness.

DIY Remedies:

1. Apple Cider Vinegar Rinse

To create an apple cider vinegar rinse, mix one tablespoon of vinegar with three cups of water. Add the mixture to your hair after shampooing and wait for 5 minutes before rinsing the solution out. Using this treatment allows you to eliminate buildup, and it works to balance your hair’s ph levels.

2. Lemon Juice Rinse

Mix lemon juice with three cups of water to create a rinse. Lemon juice serves as a final rinse that both adds shine and removes mineral deposits from hair.

3. Oil Treatments

You should rub coconut oil or argan oil onto your hair thirty minutes prior to washing for extra protection. Before washing your hair these treatment products provide beneficial hydration that safeguards against additional damage.​

Regular weekly application of these natural treatments improves hair condition and makes hair easier to manage.

Preventing Hard Water Hair Damage: Daily Habits

A regular maintenance routine helps control the problems caused by hard water conditions.​

Daily Tips:

  • Your shower requires a filter device to minimise mineral exposure.
  • Reducing the frequency of applying heat tools helps avoid additional dryness in your hair.
  • Your hair remains protected by choosing hairstyles that minimise contact with environmental threats.
  • Weekly hair shears can maintain healthy ends when maintained at a regular schedule of every 6-8 weeks.​

These practices help protect both the structure and appearance of hair.

How to Wash Your Hair in Hard Water: Step-by-Step Tips

The correct way to wash your hair will help reduce the impact of hard water.​

  • Pre-Treatment: Before washing your hair, apply a nourishing oil on your scalp for a thirty-minute period.
  • Shampoo: The treatment begins with application of a sulfate-free clarifying shampoo to the scalp area.
  • Rinse Thoroughly: A complete rinse is necessary to remove all shampoo residue.
  • Condition: Apply conditioner to your mid-lengths and ends, and keep the product away from your scalp area.
  • Final Rinse: Cool or filtered water serves to finalise the hair wash process and close the hair cuticle.​

Regularly following this regimen will result in cleaner and healthier hair.

Should You Use a Water Softener or Filter?

A long-term advantage arises from making investments in water treatment.​

Options:

  • Shower Filters: Affordable and user-friendly shower filters enable users to minimise the mineral levels in their water.
  • Whole-House Water Softeners: A whole-house water softening system offers complete water softening benefits throughout your living space, but comes with an initial high investment cost. A whole-house water softening system swaps out calcium and magnesium ions in water with sodium and potassium ions, which reduces water’s harshness on your skin and hair.
Water TreatmentProsCons
Shower FilterEasy to install, budget-friendlyNeeds replacement every 3–6 months
Whole-House SoftenerLong-term solution, benefits all appliancesExpensive installation and maintenance

Dwellers in hard water regions should consider purchasing even the most basic shower filter to see immediate benefits for their hair condition.

DIY Hair Rinses to Combat Hard Water Effects

Regular homemade DIY rinses help dissolve mineral deposits while enhancing hair shine.

1. Apple Cider Vinegar Rinse

  • Add 1 tablespoon of apple cider vinegar to 2 or 3 cups of filtered water for a homemade rinse.
  • Pour the rinse onto your hair after you finish washing it with shampoo.
  • Keep the mixture on your hair for 3–5 minutes before cleaning it out with water.

2. Baking Soda Rinse

  • Stir 1 tablespoon of baking soda into 1 cup of water.
  • Gently massage the baking soda mixture onto your scalp to dissolve dirt and oil.
  • Rinse thoroughly and condition after.

3. Lemon Rinse

  • Put 2 cups of water into a bottle and add 1 lemon.
  • Finish your hair care routine with this mixture to make your hair shiny and maintain its natural ph levels.

Apply these natural rinses weekly to cleanse your scalp and maintain silky hair.

Hair Types and Their Reactions to Hard Water

Hard water affects each hair type differently. Here’s a quick overview:

Hair TypeEffect of Hard WaterCare Tips
CurlyFrizz, dryness, loss of definitionDeep condition regularly
StraightGreasiness, limp lookUse clarifying shampoo weekly
Color-treatedColour fading, uneven toneUse colour-safe products & chelating shampoo
Fine HairGets oily fast, tangles easilyLightweight conditioners, apple cider rinse
Thick/Coarse HairDryness, rough textureHydrating masks, oil treatments

Washing Hair Care Tips

You need to find the right balance when washing hair in hard water to keep it from feeling too dry or becoming greasy. Follow these hair care rules based on how your hair grows:

  • Oily Hair: Individuals with oily hair should wash their strands every 2 to 3 days to manage shine while avoiding excessive cleansing.
  • Dry Hair: For dry hair, stick to washing every four days to sustain its natural hydration.
  • Curly or Textured Hair: Keep curly hair washes to a minimum, at one per week, with more as needed to keep frizziness and dryness under control.
  • Colour-Treated Hair: Keep your colour-treated hair healthy by washing it 2 to 3 times per week with a shampoo that safeguards colour and contains no sulfates.
  • Thin Hair: Someone with thin hair needs to wash their hair every two days to preserve the protective layer.

Protect your hair by applying a moisturising conditioner or deep conditioning treatment after every wash.

Conclusion: Protecting Your Hair from Hard Water Damage

Because hard water damages hair, you must take specific protective measures to keep it safe. If your hair becomes dry or shows signs of damage such as breakage and frizz, it’s time to make changes to your haircare routine. Replace your regular shampoo with clarifying or chelating formulas and use deep conditioners at least once a week to bring back essential moisture. 

You can use natural options like apple cider vinegar or lemon water to wash away mineral deposits in your hair. Invest in permanent solutions by adding either a shower filter or a water softener to your water system. You can keep your hair looking great despite hard water conditions by making basic changes to your washing methods, product selections, and protective routines.

Hair Transplant Cost in Turkey and India

Hair loss is a common phenomenon in today’s world where apart from the normal hair fall experienced by people, there are multiple factors causing an increased rate of the loss.
Some of the most common reasons for hair fall are bad lifestyle choices like smoking and drinking, stress, pollution and contaminated air and water. All of these lead to an accelerated rate of hair fall than the human body can replace at a normal pace.
Thus, hair restoration treatments like hair transplant surgeries have become commonplace. Another trend is to get the hair transplant in the countries popular for good quality and low cost surgery options.
When looking for options to get the hair transplant done, it is not uncommon to hear the comparisons drawn between the hair transplant cost in India and the hair transplant cost in Turkey.
So, why are these comparisons being made and is there any merit in these comparisons? Let’s find out. Turkey has been a popular destination to get hair transplant surgeries for some time now.
This is because the hair transplant price in Turkey is much lower than the Western countries. 
However, what is not considered while looking at these claims is the hidden charges for the surgery as well as the overall post-operative service quality in the country.
For anyone considering a hair transplant, it is absolutely essential to understand, what constitutes the actual cost of the treatment, wherever in the world it is done.

Some of the most important factors contributing to the cost of hair transplant surgeries are


1. Experience and qualification of the surgeon
2. Cost of stay including pre and post-operative stay
3. Facilities provided at the centre where the actual surgery takes place
4. Qualification of the support staff

What is important to understand here is, the hair transplant is a time consuming process and hence the doctor needs to be ably supported by trained and professional staff. These are some of the factors that will not be mentioned when you are looking at the hair transplant cost in Turkey.
However, when you actually land up in the country, you will realize that the lowest cost was simply an understatement and did not contain these hidden charges. Thus, you will eventually end up paying a much higher cost than you estimated.
On the other hand, when you look out for the hair transplant price in India, all these factors are clearly highlighted and each clinic will give you a break-up of all the charges.
When all the contributing factors are considered, it turns out that not only the hair transplant cost in India comes out to be lower, but the quality of service is also much higher.
A critical factor impacting the cost of the hair transplant surgery is the experience and qualification of the surgeon. When checking the hair transplant price in India, this becomes a distinguishing factor as well.
The reason being, the doctors in India are known the world over for their professional acumen. Also, since English is a primary language in India and the doctors themselves study in some of the best medical colleges around the world, they are fairly conversant and comfortable in the language.
This gives an additional comfort level to the foreign nationals travelling to India for getting a hair transplant surgery.

Why choose Dr. Sunil Arora and ALCS clinic?

Dr. Sunil Arora is a prominent name in the world of hair restoration and reconstructive surgeries in India. His dedication to the profession reflects in the stupendous results he has got for his clients and the great regard in which he is held by patients and doctors alike.
Dr. Arora was awarded the Ethicon Cosmetic Surgery Travelling Fellowship by The Association of Plastic Surgeons of India in recognition of his valuable contribution to the profession.
Dr. Arora’s illustrious career includes stints at SMS Medical College, Jaipur, CSM Medical University, Lucknow and AIIMS, Delhi before ALCS Jaipur. For anyone looking to find a good hair transplant surgeon in India, Dr. Arora is a natural choice.
What makes this entire procedure even more attractive, is the fact that the lower cost of living in Jaipur makes the overall cost of the hair transplant go down even more!